How to Quickly Modify Range Settings for Better Results
If you’ve ever added a new component in Huntron Workstation and ended up with signature data that looks less than helpful—like flat lines or what seems to be a short circuit—you’re not alone. In a recent Huntron YouTube video, the presenter shows us a simple way to adjust range settings. This helps us get clearer and better diagnostic signatures for our components.
🎯 The Problem: Default Range Settings Aren’t Always Ideal
When you first add a component—like an inductor using hand probes—the software uses default voltage, resistance, and frequency values as set in your tools and options. However, these settings are generic and may not suit the electrical behavior of specific components.
In the example shown in the video, the user adds a single-pin inductor (L5) to a test circuit. When scanned using default range settings (3V and varying resistances), the resulting signatures all resemble short circuits—vertical lines with little diagnostic value.
🧩 The Fix: Sync and Modify Range Settings
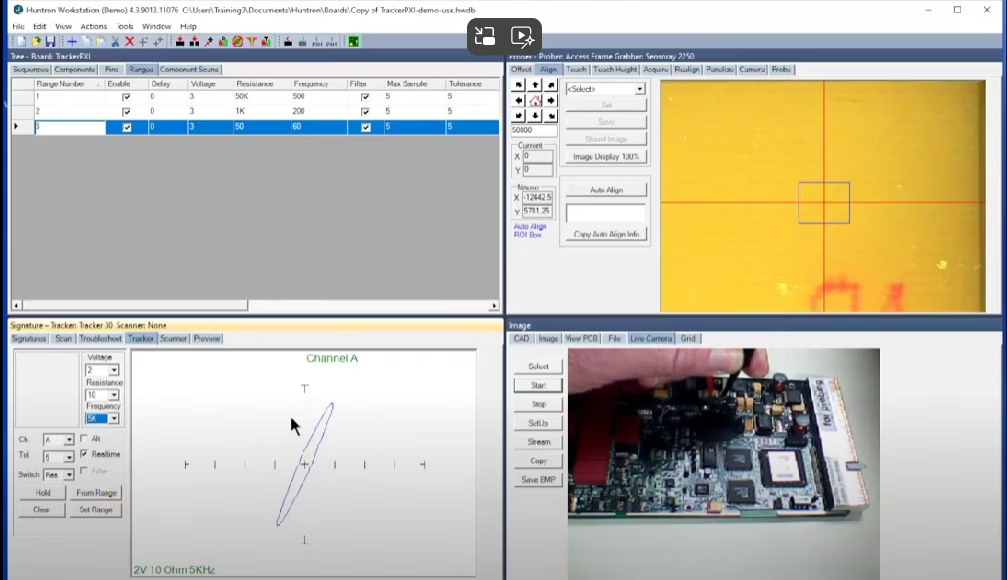
To address this, the presenter shows how to manually adjust the range settings using the Tracker Tab in Huntron Workstation:
- Select the Faulty Signature: Right-click on one of the existing signature boxes and select Sync Pin Range. This action highlights the corresponding component, pin, and range in the tree structure above.
- Click “From Range”: This copies the synced range’s voltage, resistance, and frequency values into the active test configuration in the Tracker Tab.
- Adjust Settings for Component Type:
- For inductors, you typically want low resistance (e.g., 10 ohms),
- Moderate voltage (e.g., 2V),
- High frequency (up to 5kHz) to properly visualize the expected elliptical response.
- Apply and Save: Once the new range gives a clean signature, click Set Range to update the range settings in the tree.
- Clean Up: Delete old, ineffective ranges to keep your data organized and relevant.
🤖 Using the Access Prober for Fine-Tuning Signatures in Huntron Workstation? There’s an Easier Way
If you’re working with the Huntron Access Prober, the video also demonstrates how to streamline this process using automated pin selection:
- Right-click on the signature → Sync Pin Range,
- Use Teach Height Pin to automatically move the prober to the target pin,
- Click Z Down Move to probe it,
- Tweak your range in the Tracker Tab and hit Set Range once you get a clean ellipse.
Again, don’t forget to rescan and set a new reference after modifying the range.
💡 Final Thoughts
This video serves as a great reminder that while Huntron Workstation provides a solid default setup, customizing your range settings can greatly improve diagnostic accuracy. Whether you’re manually probing or using the Access Prober, understanding and adjusting your voltage, resistance, and frequency parameters can make all the difference.
For more insights like this, check out other Huntron videos on their YouTube channel.
For more information on Fine-Tuning Signatures in Huntron Workstation, contact us.